Installing Wooden Beams On Ceiling

How We Made Our Diy Wood Beams Wood Beams Home Remodeling Farm House Living Room

Installing Faux Wood Beams In Our Master Bathroom Beneath My Heart Faux Ceiling Beams Faux Wood Beams Faux Beams

Installing Faux Wood Ceiling Beams Basic Guide With Photos Wood Beam Ceiling Faux Wood Beams Beams Living Room

Diy Beam Installation In The Family Room Faux Wood Workshop Faux Beams Faux Ceiling Beams Faux Wood Beams

Installing Beams On A Suspended Or Drop Ceiling Can Be Tricky But Not Impossible This Quick But Handy Video Instruction Faux Beams Faux Wood Beams Wood Beams

Diy Faux Wood Beams To Cover Up Damaged Ceiling Ceiling Panels Basement Remodeling Ceiling

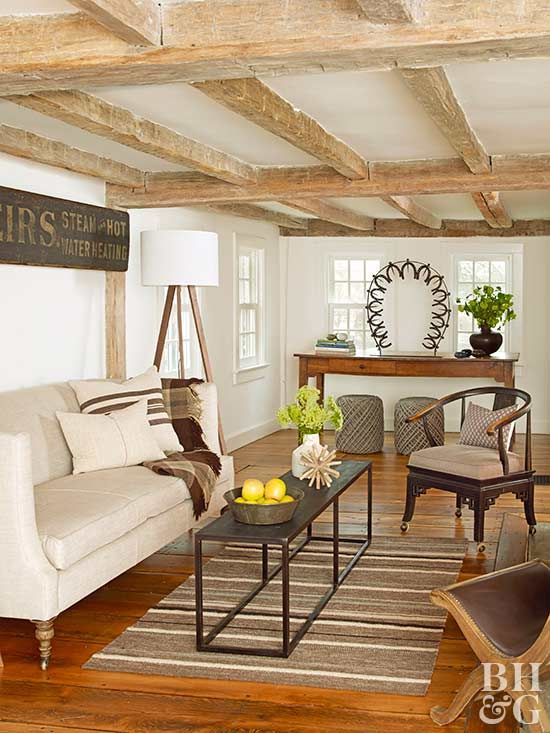
Existing ceiling joists can definitely be used but if you have removed the ceiling to install a new one this is a good opportunity to add blocking between the beams.
Installing wooden beams on ceiling.

Fake Beam Easy To Install And Can Hide Wiring So You Can Put Lights Or Fans Where You Need Them Zuhause Diy Diy Holz Haus Projekte

Install Recessed Lighting In Wood Beams Recessed Lighting Living Room Installing Recessed Lighting Recessed Lighting

Faux Ceiling Beams Wood Beam Ceiling Faux Ceiling Beams White Beams Ceiling

Vaulted Ceiling Faux Wood Beam Ceiling Fan Faux Ceiling Beams Bedroom Lighting Diy Diy Ceiling

Installing Faux Wood Beams On Cathedral Ceiling Instructions Faux Wood Beams Wood Beams Wood Beam Ceiling

Installing Faux Wood Ceiling Beams Basic Guide With Photos Wood Beam Ceiling Wood Ceilings Faux Beams

Installing Ceiling Beams And Crown Molding Faux Ceiling Beams Ceiling Beams Painted Ceiling Beams

Rusticshandcraftedco Shared A New Photo On Etsy Wood Beam Ceiling Living Room Wood Beam Ceiling Exposed Wood Ceilings

5 Ideas For Faux Wood Beams Wood Beam Ceiling Wood Beams Faux Ceiling Beams
Master Makeover Diy Wood Beams Diy Makeover Home Remodeling Faux Beams

Faux Wood Beams In The Kitchen Debbiedoos Faux Wood Beams Faux Beams Wood Beams

Island Floor Scout Nimble Dream House New Homes Home

Installing Faux Wood Beams On A Cathedral Ceiling Faux Ceiling Beams Rustic Ceiling Ceiling Lights

5 Beam Hacks To Make A Project Easier Faux Wood Workshop Ceiling Beams Wood Beam Ceiling Stained Wood Beams

Installing Faux Wood Beams In Our Master Bathroom Beneath My Heart Home Home Decor House Design

Wrapping A Drywall Ceiling Beam With Hardwood Flooring Ceiling Beams Fake Wood Beams Drywall Ceiling

Custom Timber Beams Are Easy To Install In Entranceways Description From Fauxwoodbeams Com I Searched For This On Wood Beams Faux Ceiling Beams Timber Beams

15 Faux Wood Ceiling Beam Ideas Photos Wood Beam Ceiling Vaulted Ceiling Beams Ceiling Beams
Https Encrypted Tbn0 Gstatic Com Images Q Tbn 3aand9gcqxlpq09ngnlgejev2s3dfqmnd2v9 6vyq0ecp4pb4tsql11p M Usqp Cau

We Truly Take Pride In Our Workmanship And Are Very Proud Of Our Strong Referral Based Business Http Trimxqual Faux Ceiling Beams Ceiling Beams Home Ceiling

Beams Of Light Faux Beams Beams Recessed Lighting

Installing Faux Wood Beams In Our Master Bathroom Beneath My Heart Faux Wood Beams Faux Beams Wood Beams

Install A Planked Ceiling In No Time At All How To Build It House Design Rustic Ceiling Farmhouse Flooring

Diy Wood Beam Doorway Wood Beams Wood Doors Interior Craftsman Door

Wistia Video Thumbnail Diy Ceiling Beams Installation Instruction Video With Images Wood Beam Ceiling Diy Ceiling Faux Wood

Diy Wood Ceiling Beams Wood Beam Ceiling Ceiling Beams Wood Ceilings

Mounting Chandeliers Or Ceiling Fan From Ceiling Beams Wood Beam Ceiling Faux Ceiling Beams Ceiling Beams

How To Diy A Faux Wooden Ceiling Beam Bower Power Wooden Beams Ceiling Home Diy Diy Home Improvement

Multitasking Install Faux Wood Beams And Cook Vaultedceilingdecor By Adding A Single Faux Ceiling Beam Justi In 2020 Faux Wood Beams Wood Beam Ceiling Faux Beams

Nice Staircase Design Living Room Remodel Wood Beam Ceiling Living Room Wood

Pin On Window

How To Install Faux Wood Beams Beam Me Up Scottie Faux Wood Beams Faux Ceiling Beams Faux Beams
Don T Forget Your Living Room S Fifth Wall The Ceiling Beams Living Room Ceiling Beams Living Room Rustic Living Room

How To Install Faux Ceiling Beams Fortikur Derevyannye Potolochnye Balki Kuhonnye Potolki Iskusstvennye Balki

Faux Wood Ceiling Beams 2 Ceiling Beams Living Room Wood Beam Ceiling Faux Wood Beams

Beams Part Two How To Install Diy Beams Faux Ceiling Beams Wood Beam Ceiling Home Remodeling Diy

Installing Recessed Lights Into Faux Beams For Your Ceiling Wood Beam Ceiling Faux Beams Ceiling Beams

How To Install Faux Wood Beams Faux Wood Beams Faux Ceiling Beams Wood Beams

Cathedral Ceiling Superior Faux Wood Beam Installation Faux Wood Beams Wood Beams Faux Wood

Faux Ceiling Beams With Lamp Faux Beams Wooden Beams Ceiling Faux Ceiling Beams

Black Walnut Beam Wrap Faux Ceiling Beams Wood Beam Ceiling Wood Beams

Faux Ceiling Beams Lightweight And Easy Diy Install Check Out The Install Video Https Youtu Faux Ceiling Beams Ceiling Beams Living Room Wood Beam Ceiling

Suspended Faux Beam Installation Superior Building Supplies Youtube False Ceiling Design False Ceiling Living Room Faux Ceiling Beams
Https Encrypted Tbn0 Gstatic Com Images Q Tbn 3aand9gcqiltxdctw3bplr2zxjf0axucdwr6xf4mq1ald5dcumn7mbzuy6 Usqp Cau
Source : pinterest.com
